Since the onset of the pandemic, it’s safe to say we’ve all experienced our fair share of unprecedented events, from lumber surges to a booming housing market to record-high inflation and, more recently, Elon Musk’s Twitter fiasco. Though some of the notable events of the last few years were trying, to say the least, several other developments signaled a change in everyday life for the better — one of which was the mass moving frenzy that happened in 2020 and 2021.
Driven by historically low mortgage rates and new remote work opportunities, we saw an influx of Americans pack up and move their families from notoriously expensive cities to more affordable suburbs and rural areas across the country. With the requirement to work in-office suddenly gone, many working professionals discovered a newfound sense of freedom in where they could live and what they could afford, marking a much-needed shift in the status quo here in the U.S.
Although we’ve seen the housing market cool in many cities, mortgage rates rise, and some companies double back on their work-from-home stance since that time, there’s still as strong a desire as ever to prioritize happiness, family life, and finances by moving. And while we anticipate fewer cross-country moves in 2023 than those in 2020 and 2021, we predict these up-and-coming cities will see a significant population boom in the new year.
Here’s where we believe people are moving in 2023 and some reasons why you may want to consider following in their footsteps:
1.) Austin, Texas
Austin is one of those cities you hear about constantly, either in the news or from other people. It regularly tops “Best Places to Live in the U.S.” lists and is considered one of the country’s foremost tech hubs, with top companies like Amazon, Google, Oracle, and Tesla calling the subtropical region home. Although Austin can be a relatively expensive area to live in due to its popularity, attractive tech opportunities and rate of development, several affordable cities in and around the metropolis continue to draw mass amounts of people from all over the country. In fact, Rocket Mortgage recently published an article outlining some of the fastest-growing cities in the U.S., with not one but three Austin exurbs ranking in the top five destinations.
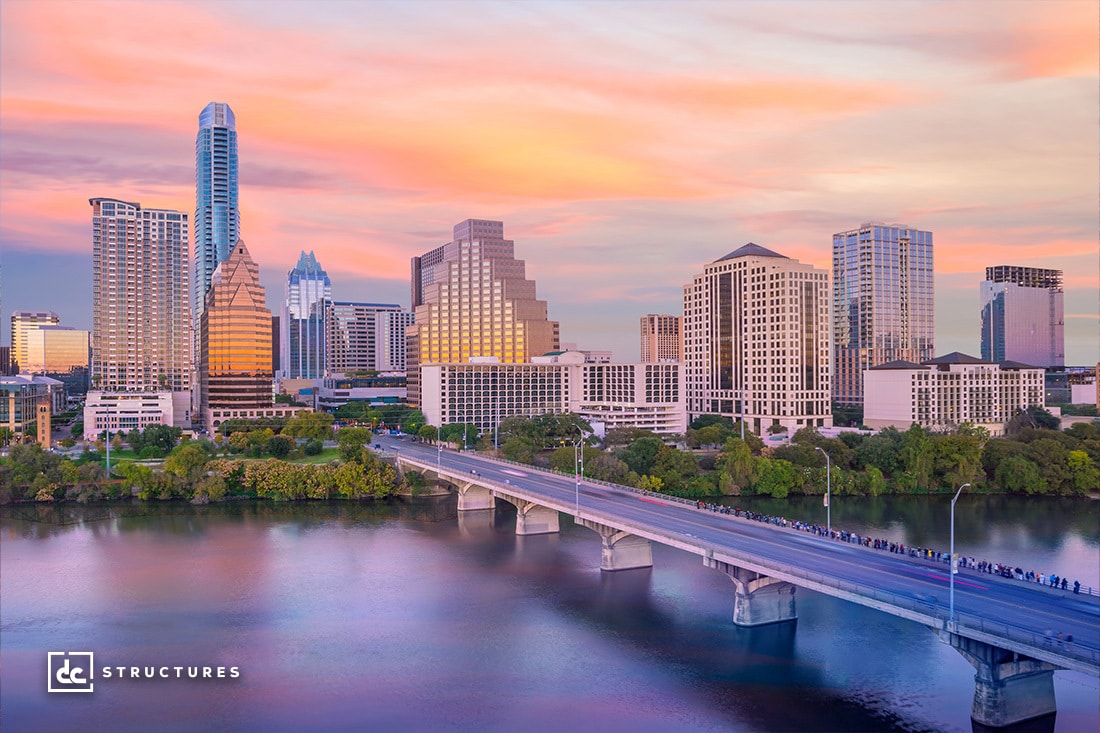
Another significant draw to living in Austin (and Texas in general) is that the state of Texas is one of few known to offer no individual or corporate income tax. That added bit of money in your pocket, combined with plentiful job opportunities and a high quality of life, makes Austin an incredibly desirable city and somewhere we expect to see consistent growth in 2023.
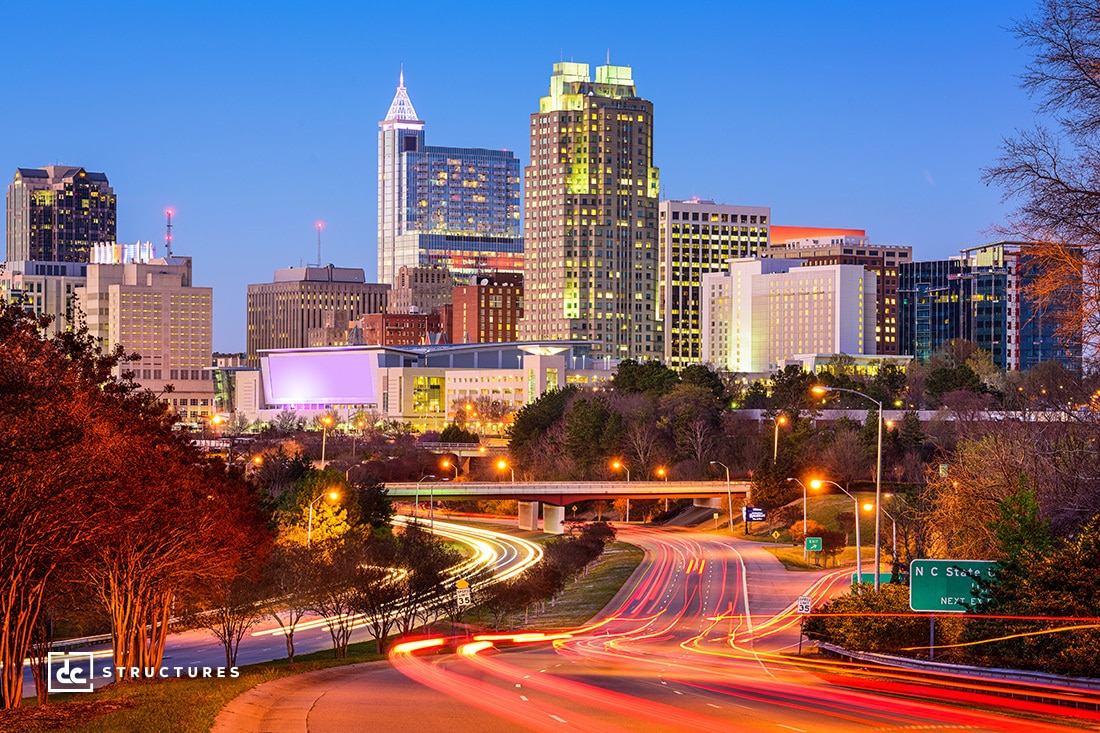
2.) Raleigh-Cary, North Carolina
There’s been talk in the last few years that Raleigh is becoming the premier city for working professionals with kids, and we can absolutely see why. The capital of North Carolina, Raleigh, is a mid-sized Southern city that’s seen exponential growth in the past decade due in part to its bustling tech culture, low cost of living, and family-friendly environment. Money.com, which ranked Raleigh as the fourth-best place to live for 2022, found that home sale prices and overall cost of living were below the average and median of some 1,300 metropolises they reviewed for their list. When you consider its tremendous affordability, as well as the city’s lush green space, diversity, and high median income, it’s no wonder why so many families are flocking to this Southern region to make it their home.
3.) Boise, Idaho
There’s a lot of charm to Boise, Idaho, which long-time residents know to be both a blessing and a curse. Between 2010 and 2018, Boise saw a population increase of 18.2% and was, at one point, considered the fastest-growing city in America. Though Boise still enjoys a high rate of tourism and new home sales today, growth has slowed considerably compared to the previous decade. Even so, we’re keeping Boise at the top of our cities to watch list for several reasons — many of which have to do with its breathtaking surroundings, vibrant nightlife, and abundance of exciting outdoor activities.
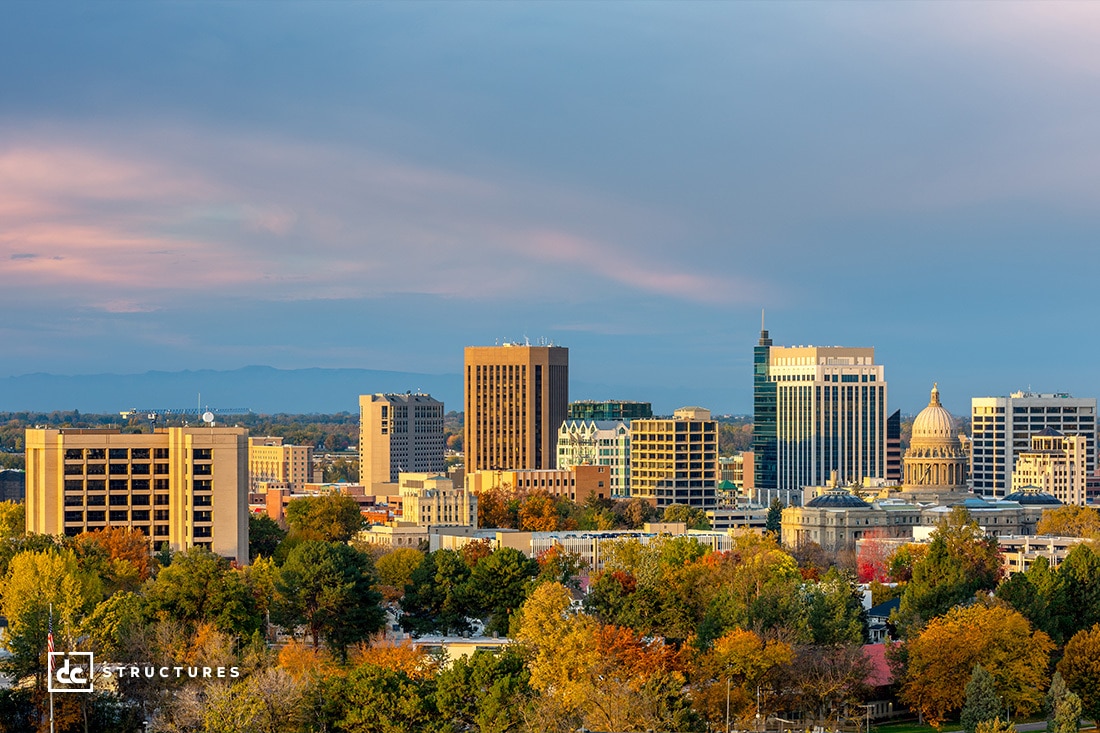
Something else that indicates Boise will see a resurgence of growth in the future is that it’s projected to be among the fastest-growing U.S. cities by 2060, according to The Center Square, with the projected population ranking 16th highest of 384 metropolitan areas studied. This report tracks with others, including the one we mentioned earlier through Rocket Mortgage that puts three neighboring Boise suburbs in a list of 15 fastest-growing U.S. cities. While some locals may be less than thrilled with the recent population boom, many residents can look forward to several positives with Boise’s incoming growth, including an anticipated 89.2% increase in employment and a considerable increase in personal income per capita by 2060.
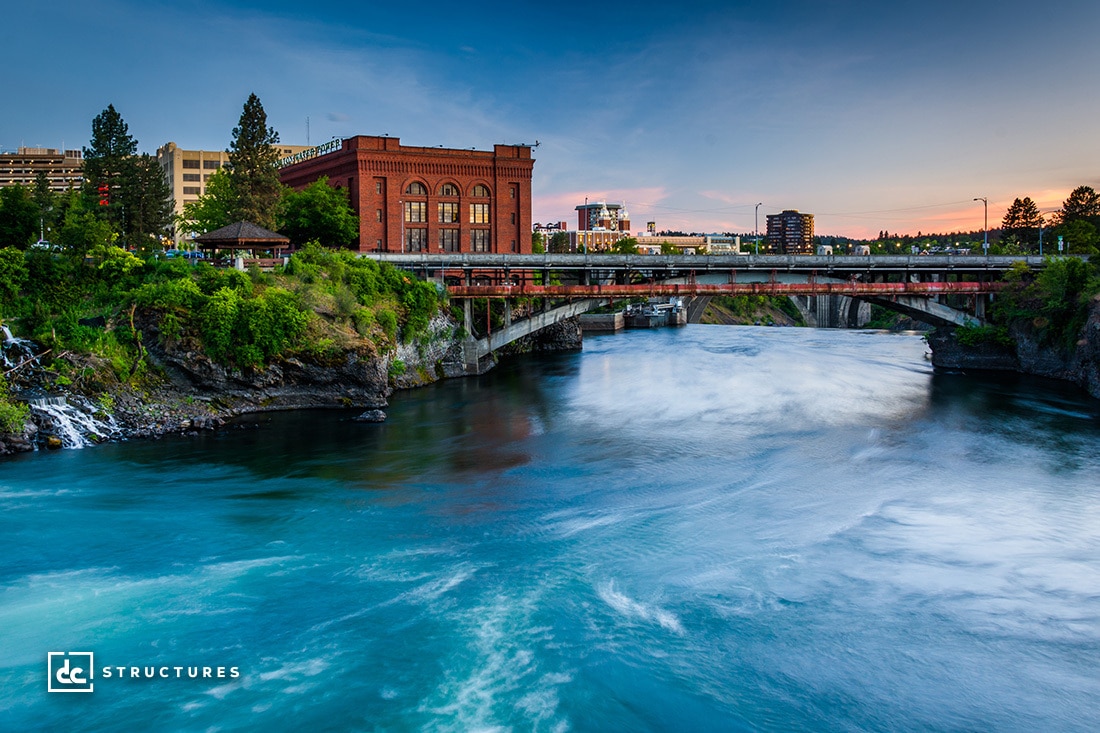
4.) Spokane, Washington
Unless you’ve lived on the West Coast or know someone who attended Gonzaga University, you’ve probably never heard of Spokane, Washington. This unassuming city in eastern Washington state is about a 30-minute drive from the Idaho border and boasts a small but thriving downtown along its famed riverfront. Despite being the second-largest city in Washington state, Spokane offers a small-town atmosphere in an otherwise burgeoning metropolitan area. This uniquely calm yet vibrant setting provides the perfect set-up for families, creatives, and individuals, making it a must-see destination for those thinking of moving in 2023.
5.) Reno, Nevada
Otherwise known as “The Biggest Little City in the World,” Reno has long been associated with casinos, bright neon lights, and booming tourism, but there’s more than meets the eye with this colorful city. Located near the California border, Reno backs up to the Sierra Nevada range, providing a host of scenic hikes and biking opportunities for residents. Not only that, but Reno is only about an hour’s drive from Lake Tahoe, making it an attractive prospect for outdoorsy individuals and families. Despite its reputation as a gambling destination, it’s much easier for Reno residents to avoid the casino scene than in its southern counterpart Las Vegas, and there’s plenty more to do outside of being downtown.
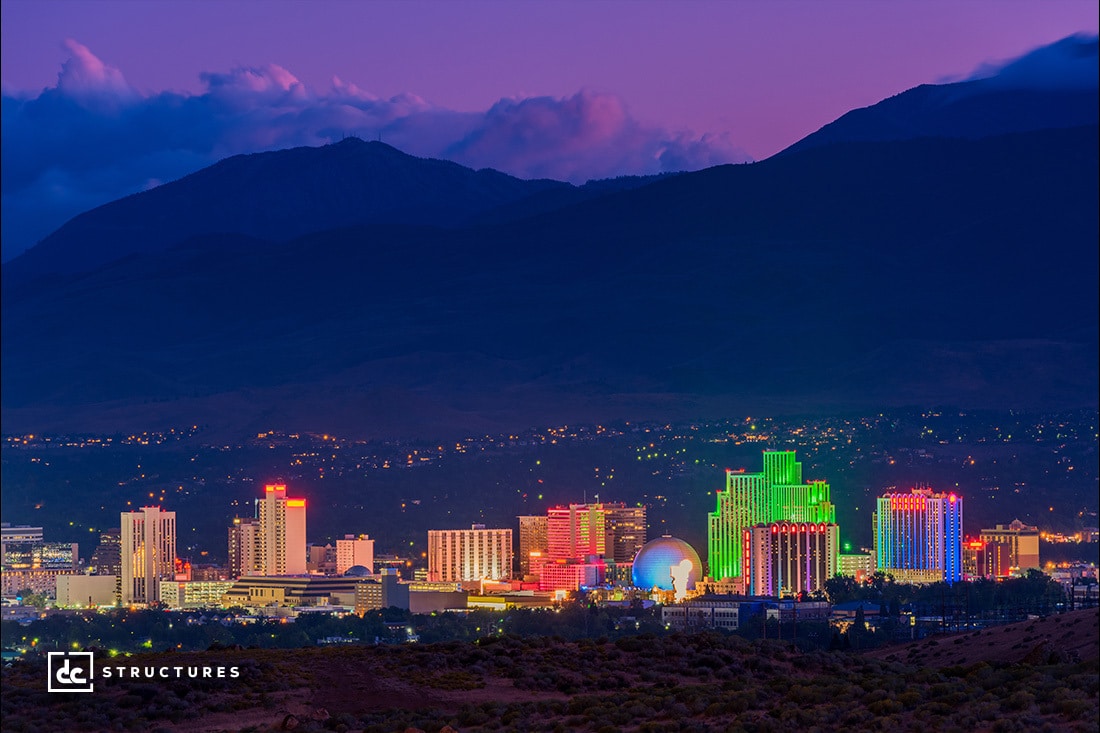
A few other bonuses that make Reno a city to watch for 2023 is that Nevada, like Texas, has no individual or corporate income tax. U.S. News also ranked it #9 for “Best Places to Live for Quality of Life” and #23 in fastest-growing places from a list of 150 metro areas in the U.S. Additionally, Reno boasts several reputable K-12 schools and plays host to the University of Reno-Nevada. With these factors in mind, as well as its prime location and relatively affordable cost of living, it makes perfect sense why Reno is shaping up to be one of the fastest-growing cities in the U.S.
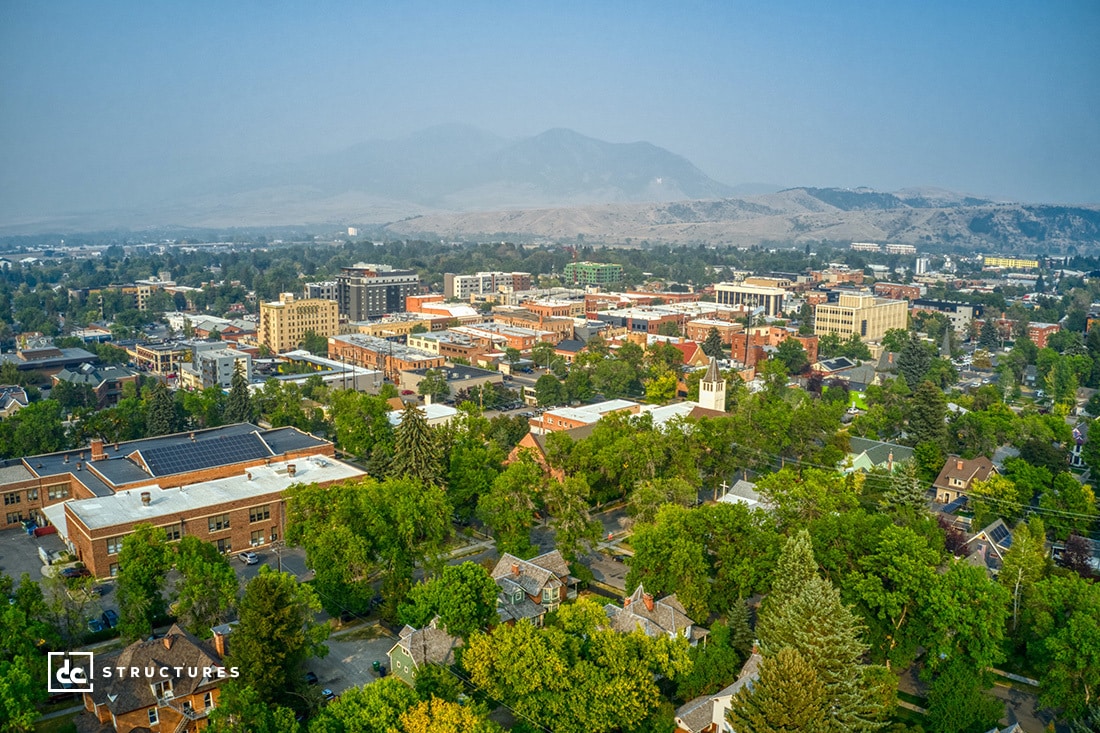
6.) Bozeman, Montana
Over the past few years, we’ve seen a massive spike in people moving to or visiting Montana — namely celebrities and California residents. While Montana is a far cry from the Golden State, it’s easy to see why big names would flock to this stunningly beautiful northern state. With its abundance of natural beauty, world-class outdoor activities, and considerably low property taxes, Montana offers the ideal homestead for those seeking wide open spaces and gorgeous green surroundings teeming with wildlife. And although Bozeman is one of the largest cities in Montana, this southwestern city strikes a unique balance between being both a thriving cultural hub and a laidback town with something for everyone.
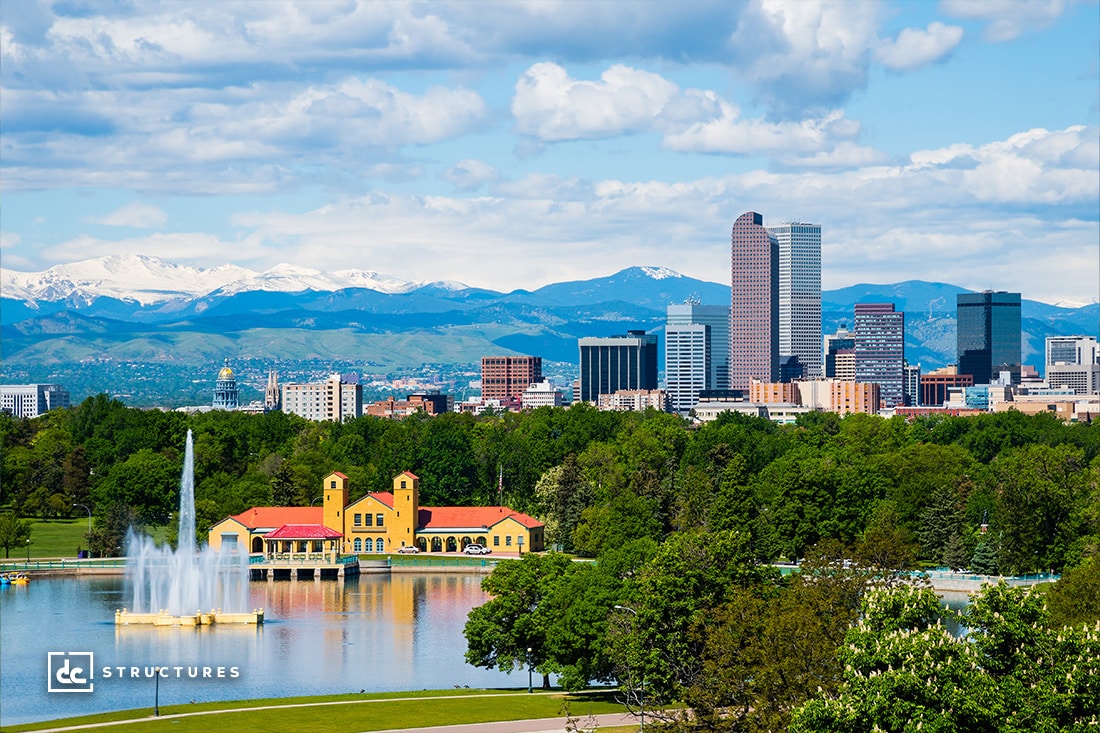
7.) Denver, Colorado
Like Austin, Denver has experienced a significant population boom in the last decade due in part to its growing reputation as a premier tech hub. Nestled at the base of the Rocky Mountains, Denver is home to more than 3 million people, with experts predicting this number will increase to 3.6 million by 2030. Over the last ten years, the capital city has become one of the best-performing real estate markets in the country, both in the commercial and residential sectors. Because of its astonishing popularity, one pitfall of the city is that the cost of living here is far more expensive than in most metro areas in the U.S., with Denver regularly ranking in the top ten lists of most expensive cities. Even so, there are plenty of understandable reasons for this, including Denver’s arid climate (locals enjoy more than 300 days of sunshine every year), thriving economy, beyond-beautiful surroundings, and incredible arts and culture scene.

8.) Missoula, Montana
Otherwise known as the “Garden City,” Missoula is one of those Western outdoorsy towns that actually lives up to its name. Located in the heart of the northern Rockies, Missoula offers the lush, sprawling green space most of us dream of in our own cities. In addition to its incredible beauty and abundance of outdoor activities, something that sets this town apart from others in the West is its strong sense of community and shared love of nature. The residents deeply care about their surroundings and preserving the region’s beauty together.
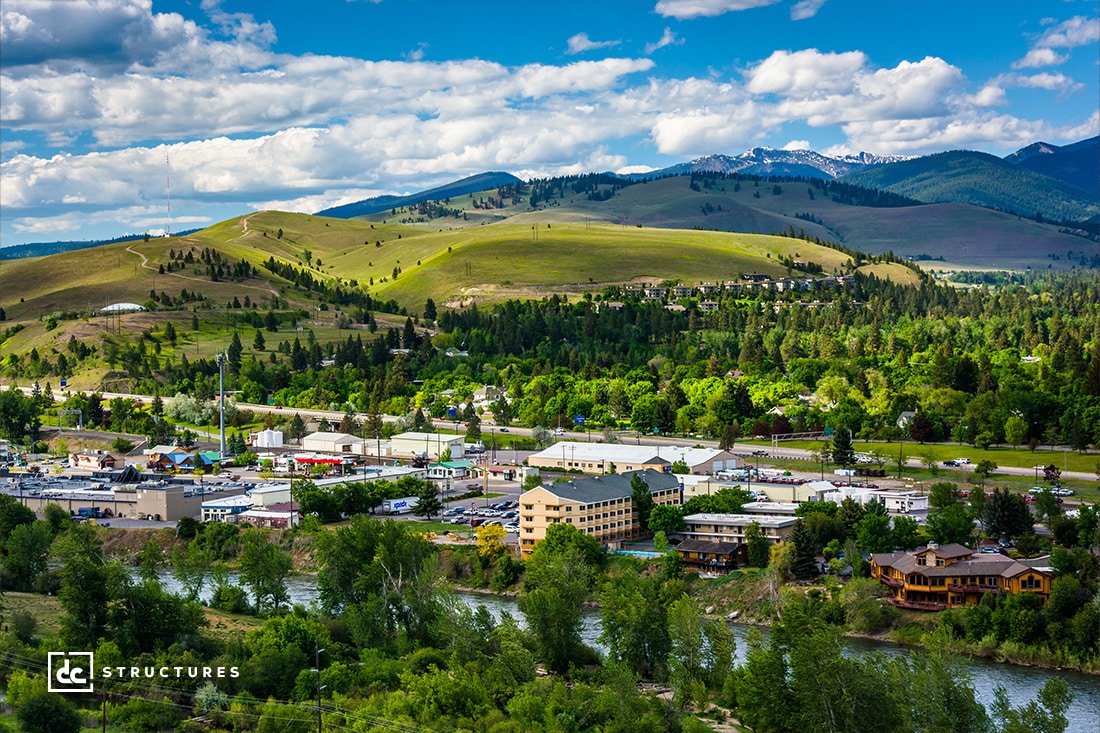
Compared to Bozeman, Missoula also offers a far more affordable cost of living, with the median home price being a little over $430,000. Although this Western town boasts a small population of about 75,000 people, there’s no shortage of things to do and see here, including world-class fishing, kayaking, hiking, and plenty more.
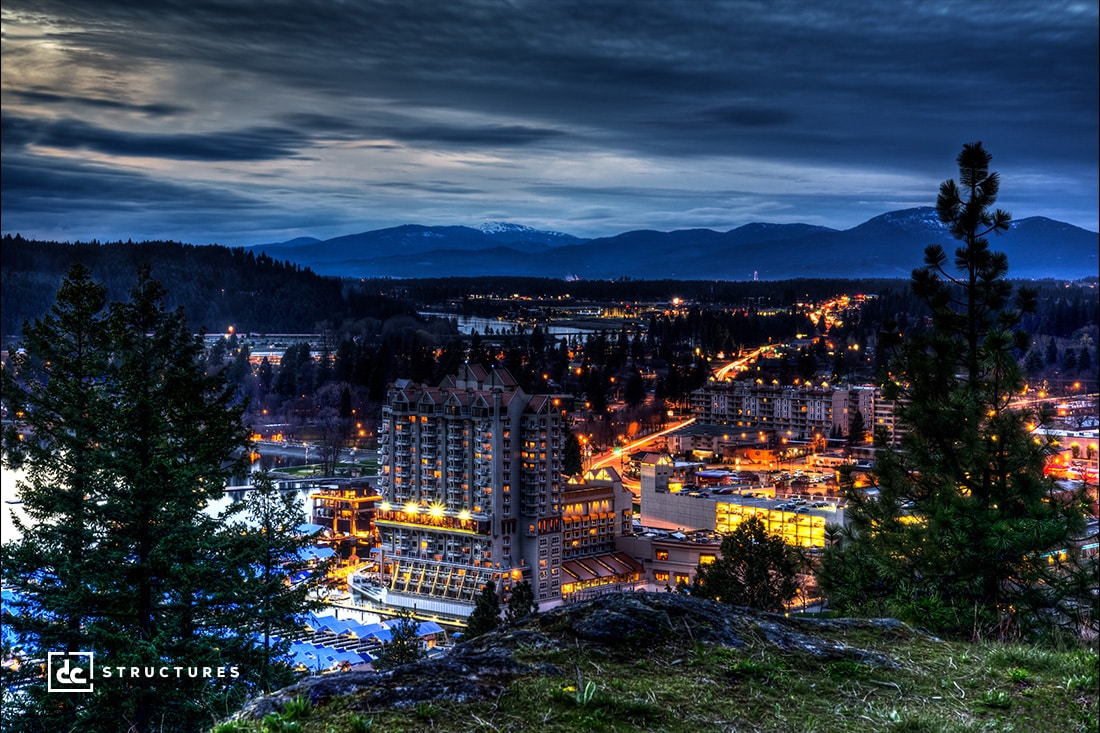
9.) Coeur d’Alene, Idaho
Coeur d’Alene, Idaho, is widely regarded as one of the top tourist destinations in the nation, and it’s not hard to see why once you’ve been there. With its magnificent 30-mile lake, sandy beaches, and widespread forest greenery, Coeur d’Alene offers almost everything you could ask for in a dream vacation getaway. Though it’s best known for its booming tourism industry, this northern Idaho city is also on track to become one of the fastest-growing cities in the nation. According to The Center Square, Coeur d’Alene saw a 16.5% population growth in the last five years, making it the fourteenth fastest-growing city among some 381 U.S. metro areas studied and another place we expect to see a population boom in 2023.
10.) Provo, Utah
Last but not least on our list is Provo, Utah — an otherwise quiet but charming college town outside Salt Lake City that plays home to Brigham Young University. Like many other metro areas in Utah, Provo is known for its gorgeous natural surroundings, family-friendly environment, and exciting outdoor activities. Although there’s talk of Salt Lake City becoming one of the fastest-growing cities in the U.S., we anticipate that Provo will also see a wave of newcomers in the future, especially with more families seeking an affordable yet safe place to raise their kids. Additionally, Provo boasts a high employment rate, with tons of manufacturing, communication, technology, and research jobs regularly available, making it a hot spot for working professionals looking for a change of pace.
Final Thoughts
Wherever you plan to move, whether it’s a city on our list or somewhere entirely different, consider what must-haves you’re looking for in your next home. If a peaceful, nature-based setting is top of your list, a city like Missoula or Provo may be the right fit for you and your family. However, if you’re looking for new tech opportunities and a fast-paced environment, you could find that places like Austin and Denver match your energy and personality a bit more.
Regardless, our team is always here to help you get started whenever you feel ready to move into your dream home. If you’re interested in finding out more about our process and what we can do for you, call us today at (888) 975-2057 or request a quote online.